
How to plan, report and produce a serialized podcast

The Oregonian/Oregon Live has several podcasts, including Beat Check with The Oregonian, which reveals to listeners how news stories are reported on and Peak Northwest, which dives into all things outdoors in Oregon and the Pacific Northwest. This year they decided they wanted to produce their first serialized, narrative podcast which is where I come in. This summer I am researching and producing their first podcast of this nature to be launched in August.
A serialized podcast is a series of podcast episodes that connect with one another to tell a story. There are as many episodes as it takes to tell the complete story, and none of the episodes stand alone.
If your newsroom wants to try producing a serialized podcast, here are three tips on how to do just that from what I’ve learned so far:
1. Be prepared
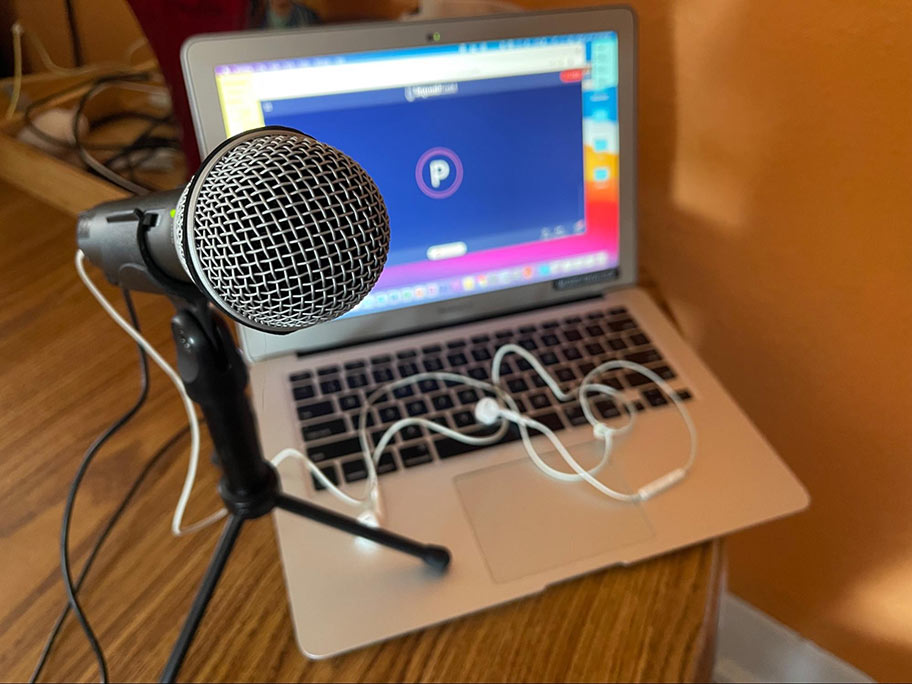
Podcasting essentials include a microphone and recording apps. The Samson USB microphone is a great affordable option that plugs right into your laptop. The set up is simple — put the mic on the stand, plug the mic into your laptop, plug your headphones into the mic and adjust your computer audio settings — but it makes a difference in your quality of interviews and voiceover. If you want, you can even send a microphone to your sources with a return label so they can have good quality audio as well.
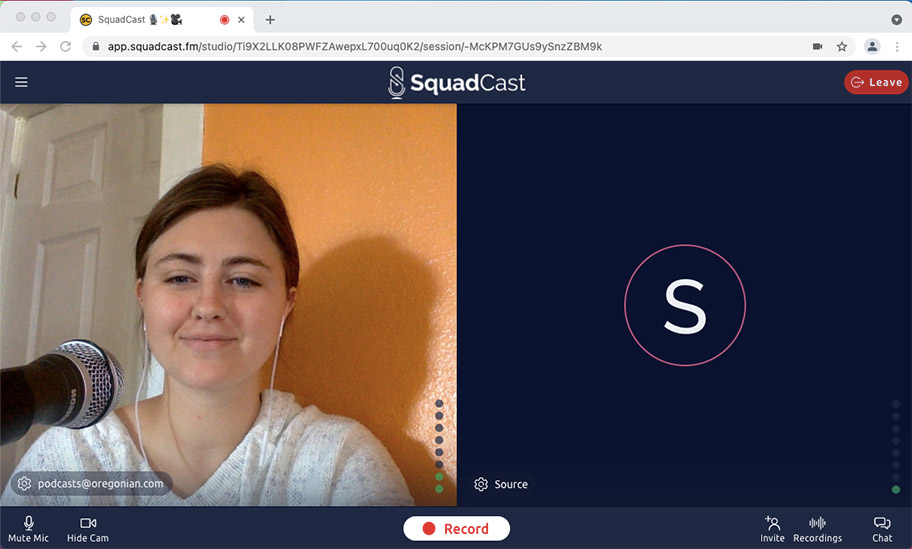
You can continue to use Zoom or Microsoft Teams to record interviews or you can try out other new options that have become more popular since the pandemic has limited in person access to sources. I use SquadCast. When you begin a SquadCast call, it looks similar to Zoom and Microsoft Teams where you can see the other person. However, depending on your subscription, it only records audio, and it records the audio as two separate files.
For phone calls, a great app for recording is the trusty TapeACall. TapeACall allows you to call your source, add the TapeACall number to your call and then merge the calls — bam, you’re recording. If a source calls you first, then you can add the TapeACall number to the existing call and then merge them together. At the end of the call, you can run your interview through the built in transcriber.
If you want a transcription service for all of your recordings across all devices, my favorite is Otter.ai. This website allows you to upload your audio and then it will transcribe it for you.
2. Storyboard before you start
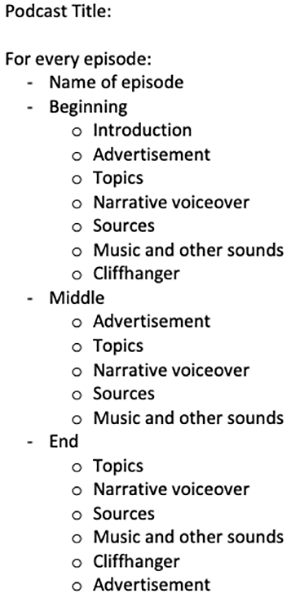
As soon as you decide to produce a podcast, make a reporting timeline. This timeline will begin on your first day of reporting and end when the first episode is published. In between these dates, create sections for how long you will spend on reporting, storyboarding, scripting, editing, critiques and publication.
Your reporting section will be where you spend the bulk of your reporting: research, interview sources, request records. Then you will map out how many episodes, how long the episodes will be and how each episode will play out. During this section, you will also see where there are holes and where you need to do follow up interviews or find new sources.
The scripting section will be where you actually begin writing and recording your voiceover, including source quotes and figuring out your total run time. The editing section will be when you edit everything together — voiceover, interviews, music, advertisements.
The critiques section will be when you send your podcast to your friends, family and coworkers to have them listen and give you feedback on the episodes. And leave time for more work because then you will make the additional edits before publication.
Your publication section is when you finally release your podcast to whatever site it will be housed on. You will also want to have a publication timeline at this point so your audience knows when each episode will be released.
3. Think beyond your content
Serialized podcasts require a lot of work outside the podcast content itself. Don’t forget to plan for music, sponsorships and advertisements, create a logo and plan promotions with the web team.
Royalty-free websites like Epidemic Sound and De Wolfe Music provide free music downloads that you can use as a main theme song or transition songs through the podcast episodes.
If you have sponsors for the podcast that require advertisements to play during the episode, then pairing these ad breaks with the music allows for breaks at the beginning, throughout the middle and at the end.
Creating a logo for your podcast is important because it is the first and possibly the only thing the listener is going to see. The podcast cover needs to match what the podcast is about and also stand out among the thousands of other podcasts on streaming sites. The Adobe Creative Cloud Suite has software that you can use to create this cover art, if you don’t have someone in your newsroom with the skills and time to help.
Promotional material needs to be pushed weeks to months in advance. You want your already existing audience to be on the lookout for the project you’re working on. These may include newsletters and social media campaigns. Social media can be used to post teasers of some of the episodes to give your audience a sneak peak to the content.
Right now I’m in the reporting phase, but as I move into producing more of this podcast, I will share more of what I’m learning!
Regan Mertz is the RJI Student Innovation Fellow at The Oregonian/Oregon Live in Portland, Oregon. This summer our student fellows will be sharing dispatches from their fellowships in newsrooms across the country as a part of Innovation in Focus.